DiskGenius provides the function to help you migrate Windows operating system and installed applications to SSD or HDD without reinstallation of OS and apps. The disk can be smaller than the source disk, and yet it should be large enough to hold the system you are going to migrate. Here is the step-by-step guide of migrating Windows 10 to SSD/HDD.
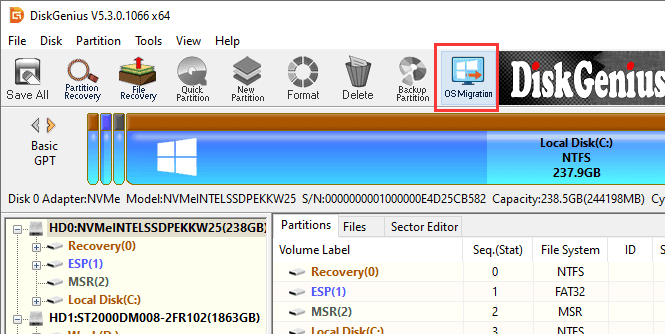
Step 1. Run DiskGenius and click System Migration button from toolbar, or choose Tools > System Migration.
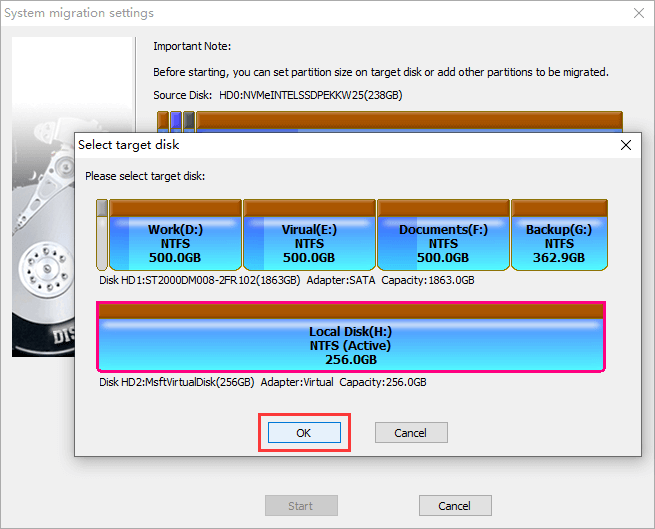
Step 2. From pop-up window select the destination disk and click OK.
Warning: files and partitions on target disk will be erased, please make sure you've backed up important files beforehand.
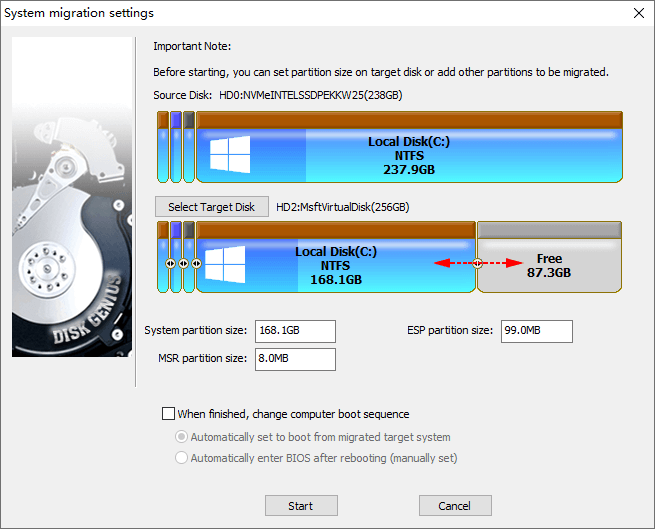
Step 3. Set partition size on target disk.
You can drag arrows between partitions to set partition size on destination disk.
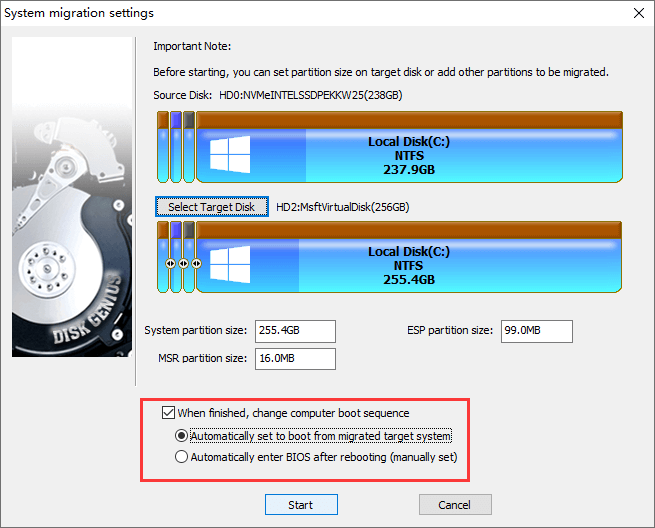
If your computer uses the modern UEFI, you can also set whether to change computer boot sequence, for example, if you choose "Automatically set to boot from migrated target system", your computer will boot from target disk automatically. If you want to continue booting from original disk, just leave this option unselected.
Step 4. View settings and click Start button.
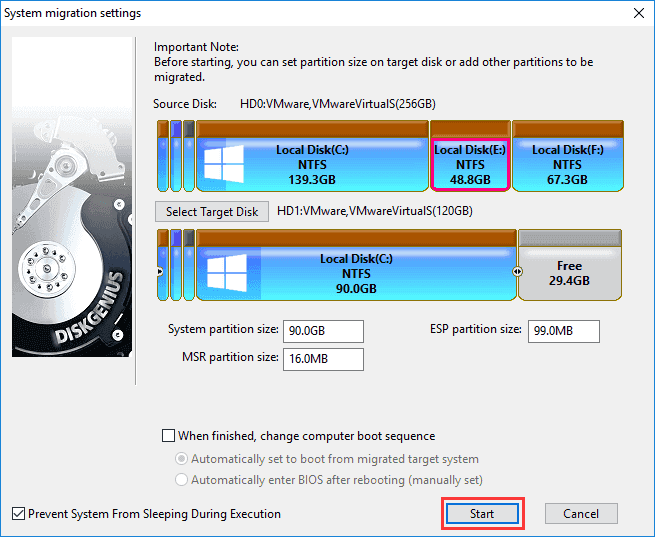
Click OK if all files on target disk have been backed up.

Step 5. Select system migration method.
How Migration: DiskGenius migrates OS to target disk without shutting down system.
Reboot to WinPE: Computer will reboot to DiskGenius WinPE edition to complete system migration.
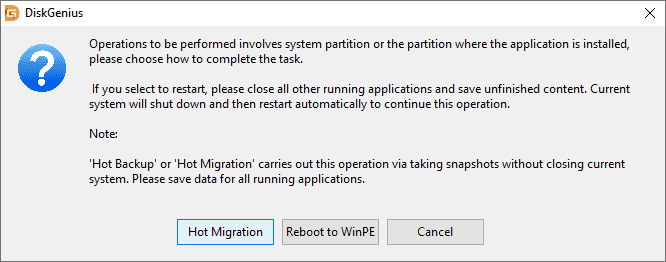
Step 6. Wait for the OS migration process to complete.
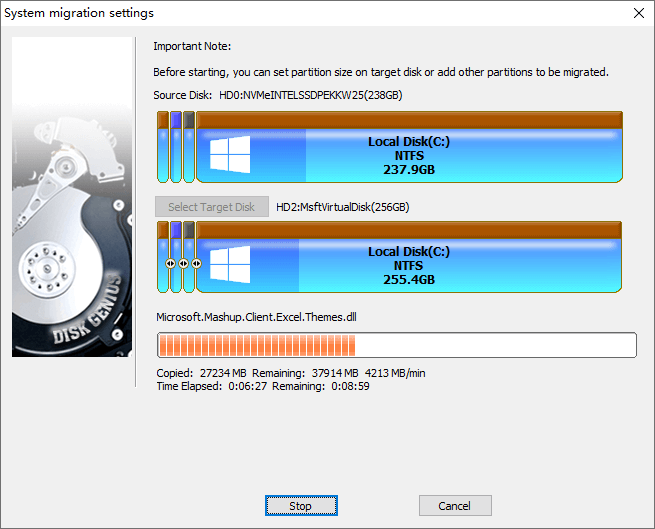
Note:
The system migration process will erase all existing data and partitions on target disk, please be sure important files on the disk have been backed up in advance.
Do not in a hurry to format original system disk or wipe data before making sure your computer can boot from target disk successfully.


